

The Top 7 night photography tips to improve your photos
Night photography presents a unique set of challenges and opportunities for photographers. The darkness offers a canvas for capturing breathtaking scenes and experimenting with light. However, without the right techniques and knowledge, it’s easy to end up with disappointing results. In this blog post, we will share the top seven night photography tips to help you enhance your skills and take your nighttime images to the next level. Whether you’re a beginner or an experienced photographer, these tips will provide valuable insights to improve your night photography game.
Plan Ahead and Scout Locations
Preparation is key to successful night photography. Research and scout locations beforehand to identify areas with interesting features, such as cityscapes, architectural landmarks, or natural landscapes. Look for places with available light sources or potential subjects that will make your images visually compelling. Use smartphone apps or websites to determine the moon phase and the position of stars to capture stunning night sky scenes. Planning ahead will save you time and increase your chances of capturing extraordinary moments.
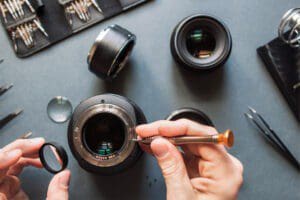
Use Manual Mode and Shoot RAW
Night photography demands full control over your camera settings. Switch to manual mode to adjust parameters such as shutter speed, aperture, and ISO manually. This control allows you to achieve the desired exposure and creative effects. Additionally, shooting in RAW format enables you to retain more details and provides greater flexibility in post-processing. While RAW files occupy more storage space, they allow you to correct exposure and fine-tune your images with better results.
Invest in a Sturdy Tripod
A tripod is an essential tool for night photography. It keeps your camera stable during long exposures and reduces the risk of blurry images caused by camera shake. Invest in a sturdy tripod that can withstand windy conditions and uneven terrain. Look for features like quick-release mechanisms, adjustable legs, and a ball head for easy composition adjustments. Additionally, use a remote shutter release or the camera’s self-timer function to prevent any additional shake caused by pressing the shutter button.
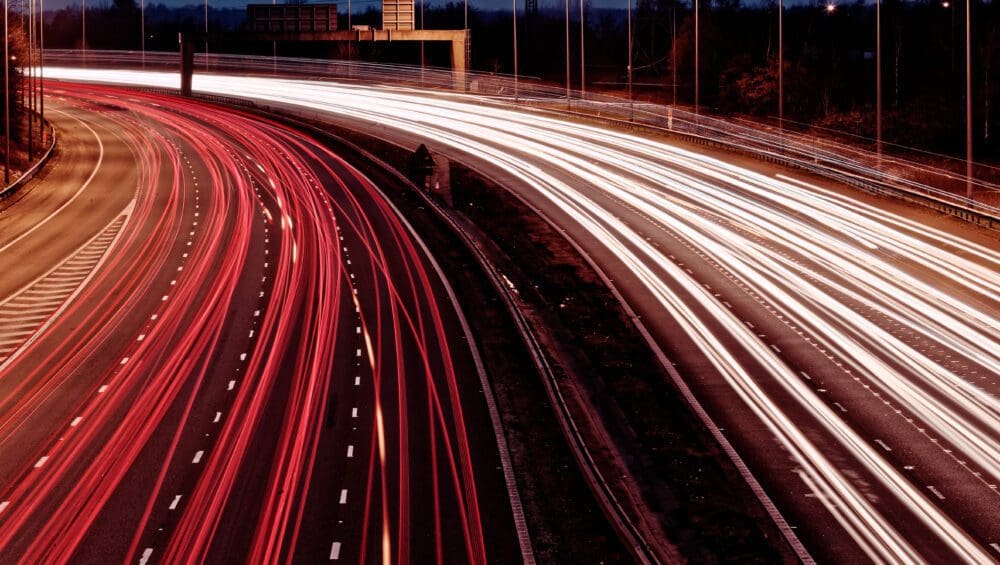
Experiment with Long Exposures
Long exposures are a fundamental technique in night photography. They allow you to capture light trails, starry skies, and smooth water effects. Start by using a slow shutter speed, such as 10-30 seconds, and adjust it based on the desired effect and available light. To avoid overexposure, consider using a smaller aperture (higher f-number) and a low ISO setting. Experiment with different subjects, such as car light trails, moving clouds, or flowing rivers, to add dynamism and visual interest to your photographs.
Master Low-Light Focusing
Achieving sharp focus in low-light conditions can be challenging. Here are a few techniques to improve your low-light focusing:
a) Manual Focus: Switch to manual focus mode and use the camera’s focus peaking or magnification feature to ensure precise focus.
b) Focus Using Light Sources: Utilize available light sources, such as distant streetlights or the moon, to help you manually focus on a subject.
c) Use a Flashlight: Shine a flashlight on the subject briefly to autofocus, then switch back to manual focus to lock it.
Experiment with Light Painting
Light painting is a creative technique that allows you to add unique elements to your night photographs. It involves using a handheld light source, such as a flashlight or LED panel, to selectively illuminate specific areas or objects in the frame. With long exposures, you can paint with light to draw shapes, highlight textures, or accentuate certain details. Practice different light painting techniques and experiment with exposure times and movements to achieve captivating and artistic effects in your images.
Post-Processing for Night Photography
Post-processing is the final step in bringing out the best in your night photographs. Consider the following tips:
a) Noise Reduction: Use noise reduction tools to minimize noise in high-ISO images while preserving details.
b) Exposure Adjustment: Fine-tune exposure, contrast, and highlights to enhance the overall balance and mood of your images.
c) White Balance: Adjust white balance settings to correct any colour cast or enhance the atmosphere.
d) Enhance Details: Apply selective sharpening and clarity adjustments to enhance the details in your night photographs.
By following these top seven night photography tips, you’ll be well on your way to capturing stunning and evocative images in the darkness. Remember, practice is key to mastering this challenging genre. Embrace the unique opportunities that night photography offers, experiment with different techniques and subjects, and continuously refine your skills. With time and dedication, you’ll be able to create mesmerizing photographs that showcase the beauty and magic of the nocturnal world. So, grab your camera, head out into the night, and let your creativity shine!


